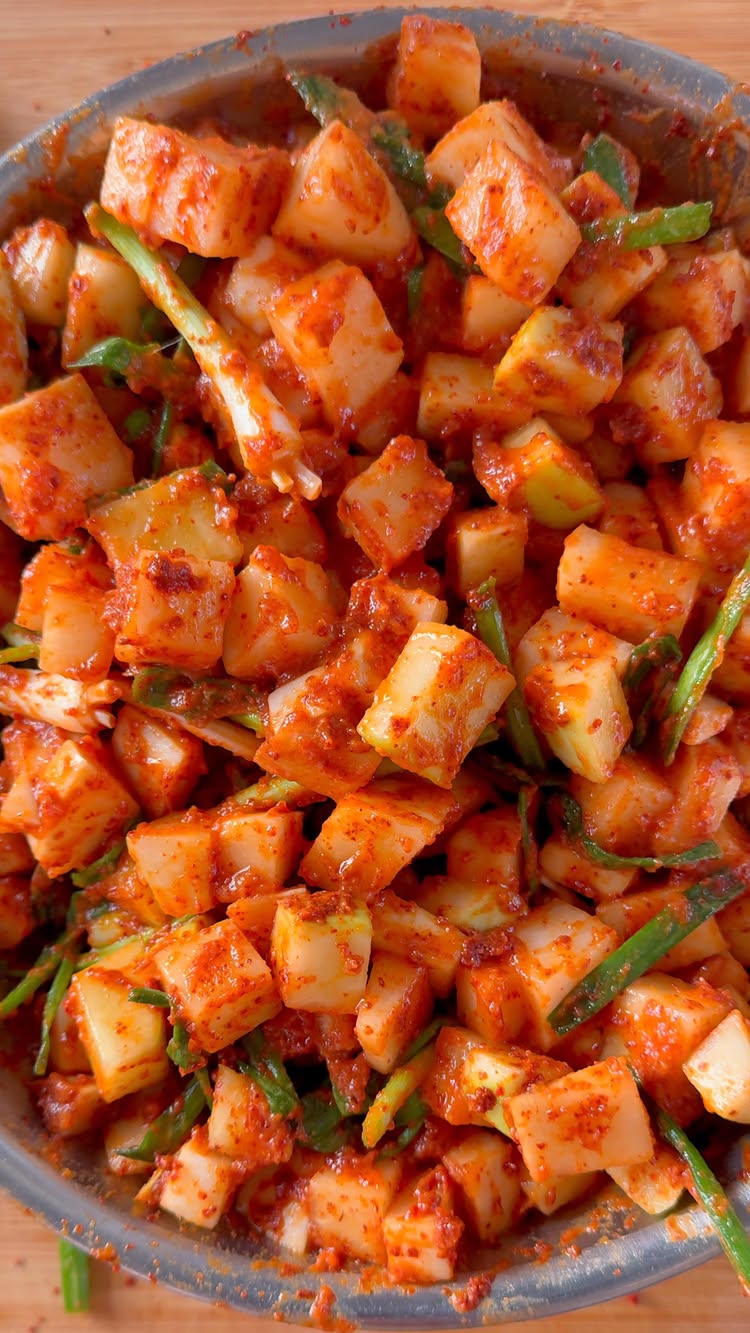
Ggakdugi (Radish Kimchi) Ingredients Radish: 1 (2kg) Salt: 4 tbsp Sugar: 4 tbsp Scallions: 10 Fish Sauce: 2 tbsp Gochugaru (Korean chili flakes): ½ cup Blended Sauce * Onion: 1 * Apple: ½ * Red Peppers: 5 * Ginger: 1 tbsp * Garlic Cloves: 10 * Cooked Rice: 2 tbsp (or substitute with 2 tbsp rice flour, gelatinized with ¼ cup boiling water) * Fermented Shrimp Paste: 2 tbsp Instructions 1. Prepare the Radish * Clean the radish thoroughly, scrubbing the outer layer to remove any dirt. * Cut the radish into 1-inch (2.5 cm) cubes. 2. Salt and Sugar the Radish * Transfer the cubed radish to a large bowl. Sprinkle evenly with salt and sugar. * Toss the radish thoroughly, ensuring the salt and sugar are well distributed. * Let the radish sit for 40 minutes to draw out excess moisture, tossing once at the halfway point for even salting. 3. Prepare the Scallions * Cut the scallions into 2-inch (5 cm) matchsticks. * Toss the scallions with 2 tbsp of fish sauce and set aside. 4. Make the Blended Sauce * Blend all the sauce ingredients until smooth. 5. Assemble the Ggakdugi * After salting, drain the excess liquid from the radish. * Coat the radish evenly with gochugaru. * Add the scallion mixture and the blended sauce. Toss everything together until well combined. Fermentation Tips * Place the ggakdugi in a cool, shaded area for 1 day. Once liquid begins to form, stir to combine. * The fermentation time depends on your preference and the temperature: * Winter: Ferment outside for up to 3 days before transferring to the fridge. * Summer: A half-day outside is usually enough. * For the best flavor, refrigerate the ggakdugi for at least 3 days before eating.
A woman cooks a tasty beef and mushroom hot pot dish at home and eats it.
4.1Mviews
66Klikes
317comments
4.7Kshares
6.6Ksaves
1.1Mfollowers
18slong
1.6%liked
hookThe opening shot shows beef rolls going into a pan with gentle music playing.
Top down angle. Hands place beef wrapped mushrooms into a big pan.
Clean setting. A bright and clean kitchen sits in the background.
Soft music. A light, upbeat song begins playing immediately.
Broad appeal. Delicious home cooking appeals to almost everyone.
retainFast edits and appetizing food keep the viewer watching until the last bite.
Fast edits. The video has 12 shots in 18.1 seconds, changing very quickly.
Simple steps. You see how to roll, cook, sauce, and eat the food step by step.
Expressive reactions. The cook smiles and sways with delight when she takes a bite.
Tasty looks. Dipping warm cooked beef into fresh egg sauce looks very tasty.
rewardViewers feel hungry and inspired to make this easy beef enoki roll recipe.
Feeling hungry. Watching the hot meal cook makes you want a tasty dinner.
New recipe. You learn a fast way to wrap mushrooms in beef with a simple sauce.
Cheerful feeling. The upbeat music and happy eating put you in a good mood.
doobydobapbeef enoki rollshot pot recipequick cooking videodelicious asian foodsukiyaki beefenoki mushroom rollseasy dinner ideahome cooking tutorialcomforting food
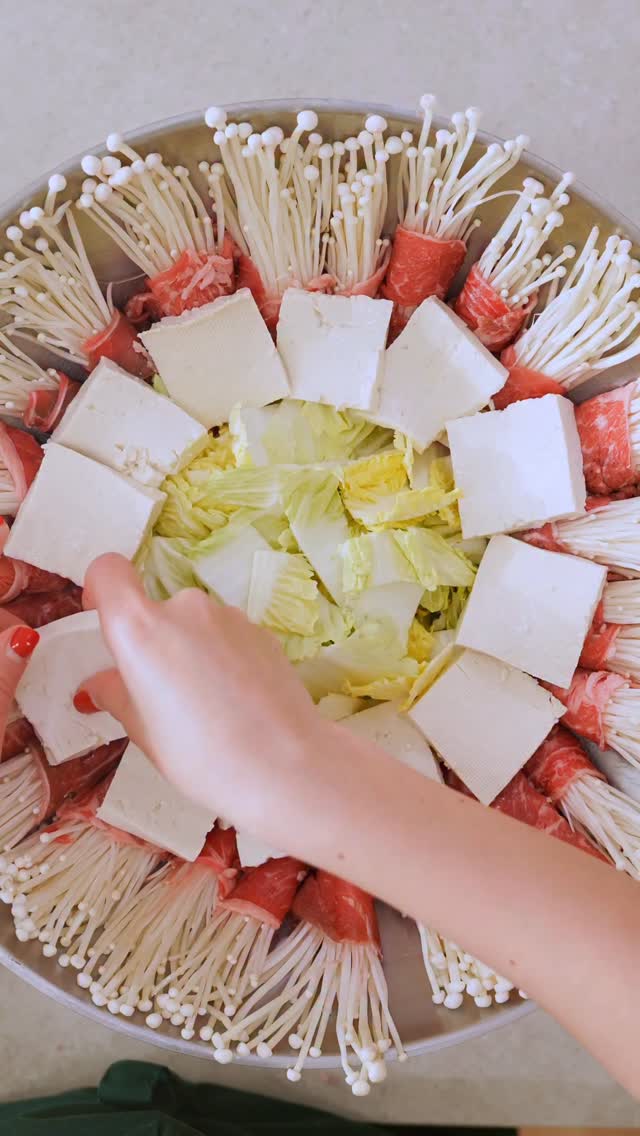
Beef Enoki Rolls 4 packs enoki rolls 200g thinly sliced beef ½ cabbage ½ tofu Sauce ¼ cup soy sauce ½ cup white wine 2 tbsp sugar 1 raw egg as “sauce” for extra creaminess
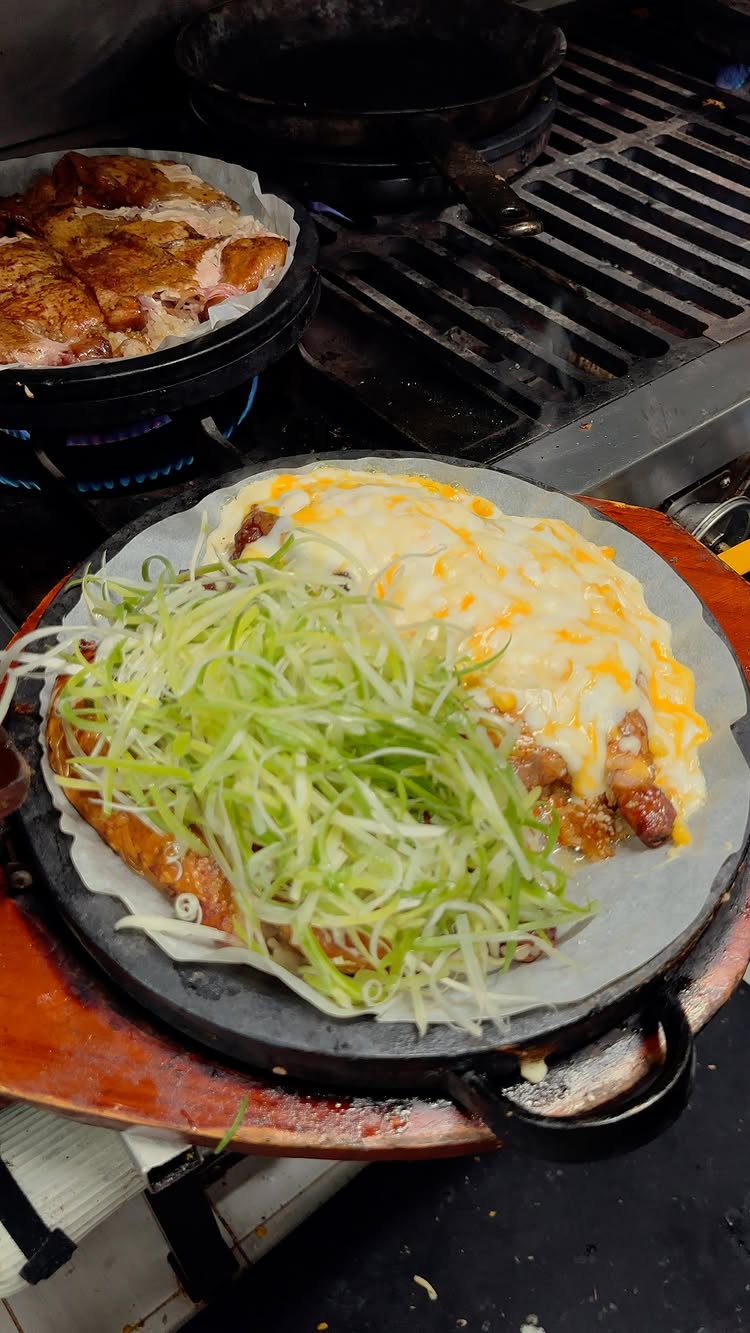
BULGOGI PHILLY CHEESESTEAK (or Seoully Cheesesteak!) 400g thinly sliced ribeye or chuck 1 whole onion, mandollined 1 leek top, thinly sliced 2 tbsp brown sugar 2.5 tbsp soy sauce 10 slices of American cheese 1 hard roll 1 tbsp neutral oil 2 tbsp butter Cook in a cast iron pan over medium high heat. Add the sliced beef in a single layer and don’t overcrowd the pan. Leave it alone so it develops caramelization. Once the bottom browns, add the mandolined onion and sliced leek on top. Sprinkle the brown sugar, then flip everything together. Deglaze with the soy sauce and let it cook until the liquid evaporates. Add cheese on top, cover with a lid, and let it melt for three minutes. Place a halved hard roll directly onto the cheese. Scoop the mixture into the roll. Add extra cheese if you want. Wrap the sandwich tightly in foil. Keep it warm in the oven for five minutes so the juices settle and the inside stays at temperature.
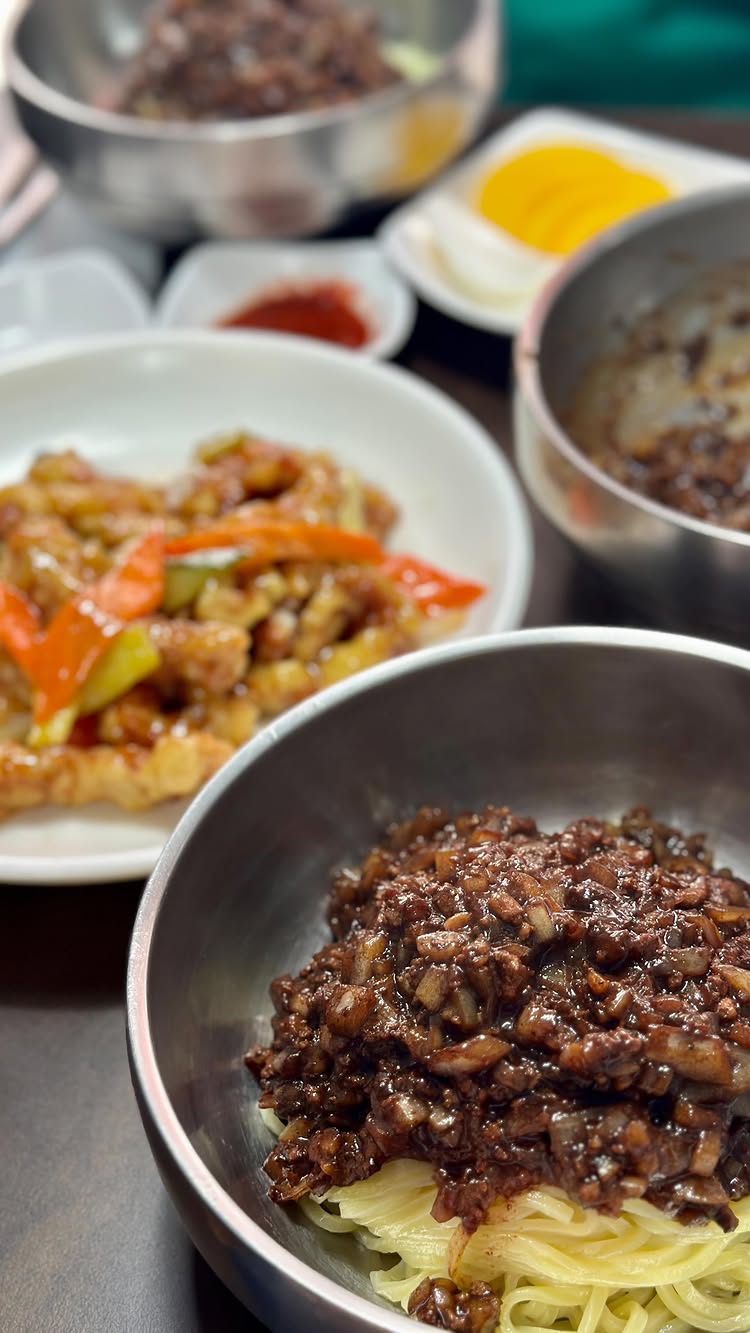
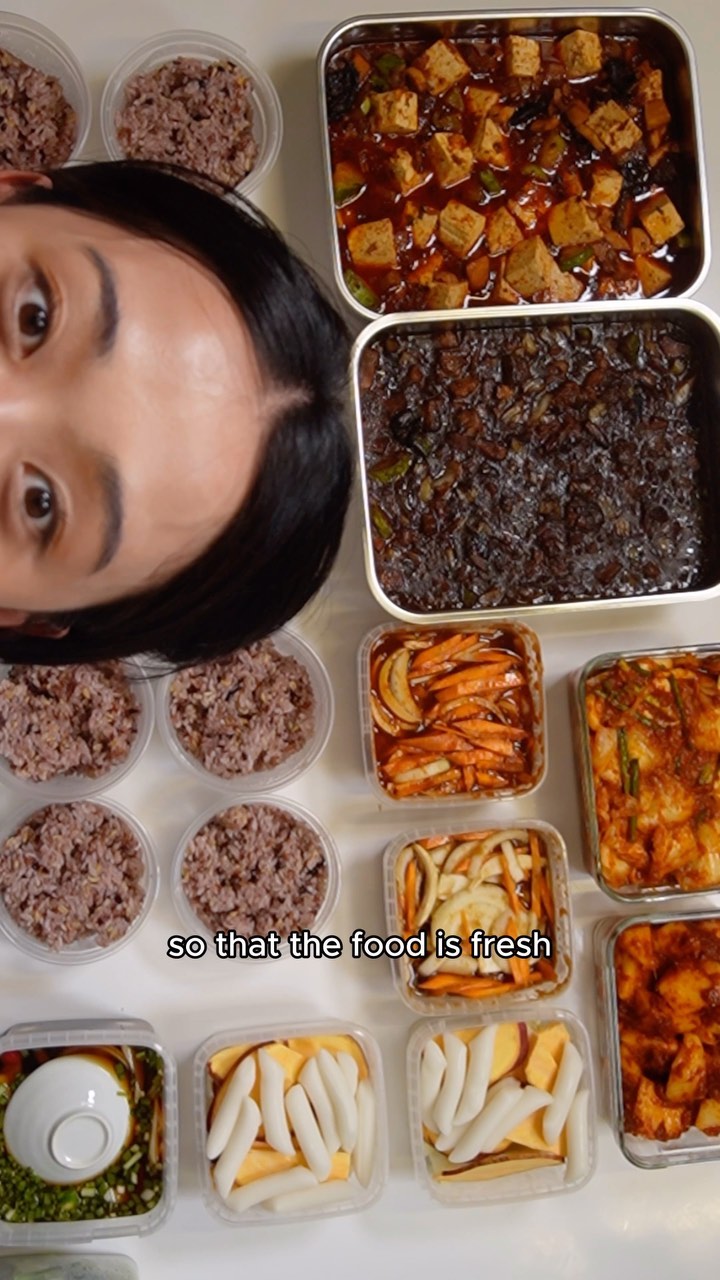
All you need to do is follow these 3 easy steps STEP 1: Plan Ask yourself what you’re going to make and categorize it into these 4 components 1. Rice 2. Banchan aka supporting dishes 3. Soups n Stews 4. Last Stir fries Rice will be your source of carbs Banchan will give you dimension and extra fiber Soups and Stews will give you comfort and nourishing broth And Stirfries will give you tasty marinated proteins And write out what you’ll make. Before you do, do a quick inventory check to see what you already have in the fridge so you can utilize everything. This week I’ll make purple mix grain rice Blanched Broccoli Soy marinated Eggs Kimchi Soondubu aka spicy tofu stew Jjajang aka black bean sauce Sweet soy marinade and spicy gochujang sauce for the chicken Write out all the ingredients you’ll need and sort it out again by ingredients STEP 2: Grocery Shop STEP 3: Prep Remember how we sorted by ingredients, start prepping in the order of vegetables to protein to avoid cross contamination And to reduce washing time Bulk prepping by ingredients instead of recipe will reduce your prep time by HALF I like to finish 90% of the work and the last 10% I like to do right before I eat so the food is fresh. Depending on how much I’m planning on eating at home, usually I freeze half and it usually keeps me fed for almost two weeks.
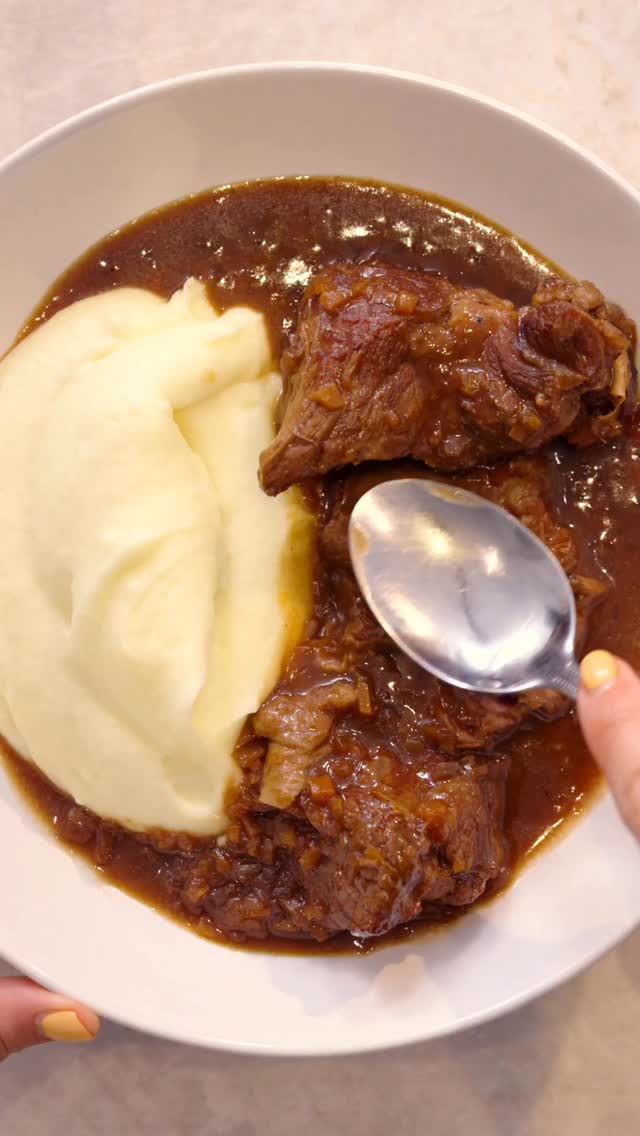
Soy Braised Mash & Stew 1 kg beef chuck 1 tbsp neutral oil ½ cup onion, finely chopped ½ cup carrot, finely chopped ½ cup daikon, finely chopped optional thickening (Beurre-Manié.. ish) 2 tbsp butter 1 tbsp AP flour 1 tbsp potato starch ¼ cup light soy sauce 2 tbsp dark soy sauce 3 tbsp brown sugar 500mL beef stock Cut the beef into large chunks. Dice the onion, carrot, and daikon into a mirepoix. Pat the beef dry with paper towels so it sears properly. Heat a pan and sear the beef on all sides until browned. Remove and set aside. In the same pot, lightly sauté the onion, carrot, and daikon until fragrant. Add the seared beef back into the pot. Pour in the soy sauce and brown sugar. Deglaze with beef stock, scraping up the browned bits from the bottom of the pot. Place a cartouche (a piece of parchment paper with a small hole in the center) over the braise to keep moisture in. Cover with a lid and transfer to the oven. Cook at 150°C for 3 hours, until the beef is tender. To thicken the stew… In a small bowl, combine softened butter, all-purpose flour, and potato starch to form a smooth paste. Ladle a small amount of the hot braising liquid from the pot into the mixture and whisk until fully blended — this tempers it and prevents lumps. Pour the tempered mixture back into the stew while stirring gently. Simmer for a few minutes until the sauce thickens to a glossy, velvety consistency. Mash 1kg potatoes 2 tsp kosher salt (for cooking potatoes) 150g butter 200ml cream Season with salt to taste Place the potatoes (skin on) into a pot of cold, well-salted water. Bring the pot up to a gentle boil and cook until the potatoes are tender and can be easily pierced with a knife (about 15–20 minutes, depending on size). Drain the potatoes well, then pass them through a sieve or potato ricer for extra fluffiness. While the potatoes are still warm, add the butter and cream and fold them into the mash until smooth and fully incorporated. Season with salt to taste and serve.
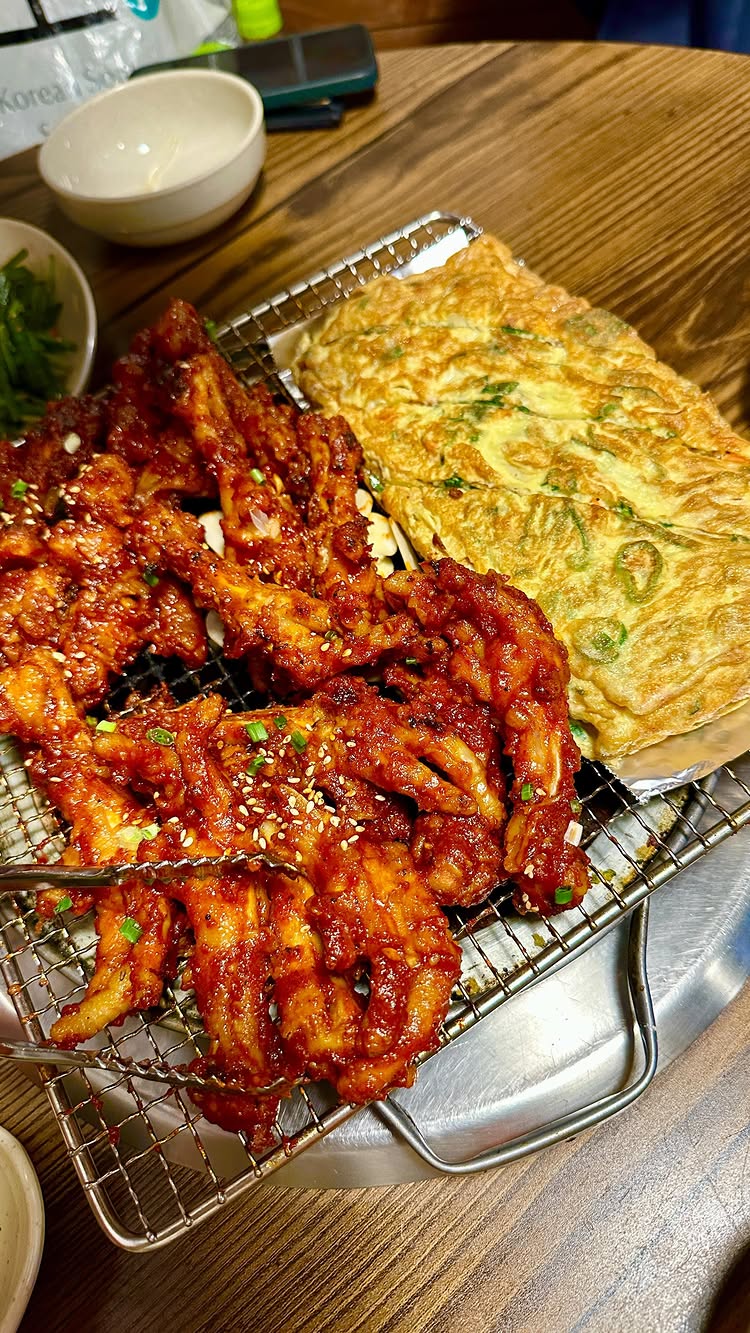
i love feet dont yuck my yum 📍애리꼼닭발 3 Wangsimni-ro 22-gil, WangsimniDoseon-dong, Seongdong-gu, Seoul We had to wait one hour but u can grab a ticket and come back! #korean #food #spicy #koreanfood #feet
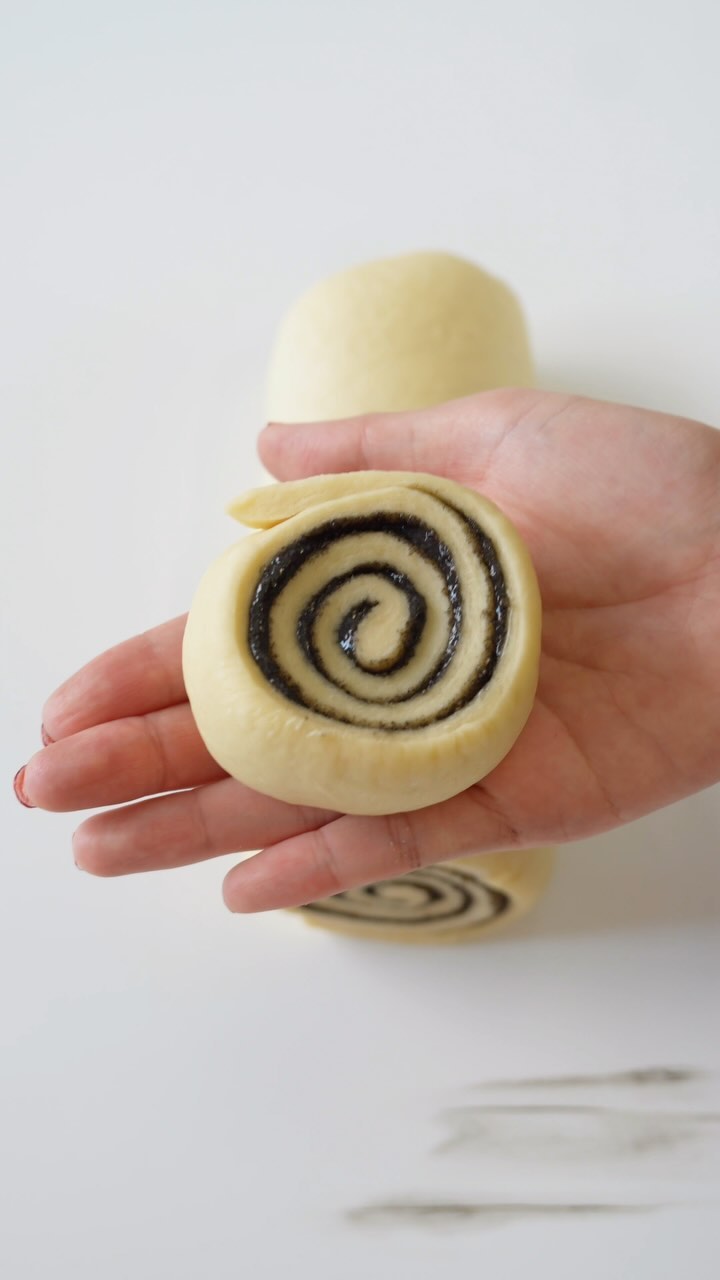
black sesam-emo roll Dough 120 ml lukewarm milk 5g dry yeast 1 egg 50 g sugar 2 g salt 35 g butter melted 315 g AP flour Filling 75g brown sugar 37.5g soft butter 75g black sesame paste 45g heavy cream Black Sesame Cream Cheese Frosting 100g powdered sugar 50g cream cheese 50g black sesame paste 20 g boiling water 1g salt Prepare the Dough: Activate Yeast: In a small bowl, combine warm milk and 1 tbsp of sugar. Sprinkle the yeast over the milk, stir gently, and let it sit for 5-10 minutes until it becomes frothy. Mix Wet Ingredients: In a large bowl, whisk together the remaining sugar, eggs, melted butter, and salt. Add the frothy yeast mixture and mix well. Add Flour: Gradually add the flour, 1 cup at a time, mixing with a wooden spoon or in a stand mixer with a dough hook attachment until a soft dough forms. If using a stand mixer, knead for 5-7 minutes until the dough is smooth and elastic. If mixing by hand, knead on a floured surface for 8-10 minutes. Let Dough Rise: Place the dough in a lightly oiled bowl, cover with plastic wrap or a clean kitchen towel, and let it rise in a warm place for 1-1.5 hours, or until it has doubled in size. Prepare the Filling: Mix all the ingredients together until airy. Assemble the Rolls: Roll the Dough: Once the dough has risen, punch it down to release air. Turn it onto a floured surface and roll it into a 12x18-inch rectangle. Spread the Filling: Spread the black sesame filling evenly over the rolled dough, leaving a small border around the edges. Roll and Cut: Roll the dough tightly from the long edge into a log. Slice into 6 rolls using dental floss. Arrange the Rolls: Place the rolls into a greased 9x13-inch baking dish leaving space between them. Cover with a towel and let them rise for another 30-45 minutes for second fermentation. Bake the Rolls: Preheat the Oven: While the rolls rise, preheat the oven to 350°F (175°C). Bake: Once the rolls have risen, bake them for 20-25 minutes until they are golden brown on top but still soft in the center. Prepare the Icing: Mix all the ingredients together until glossy and smooth.
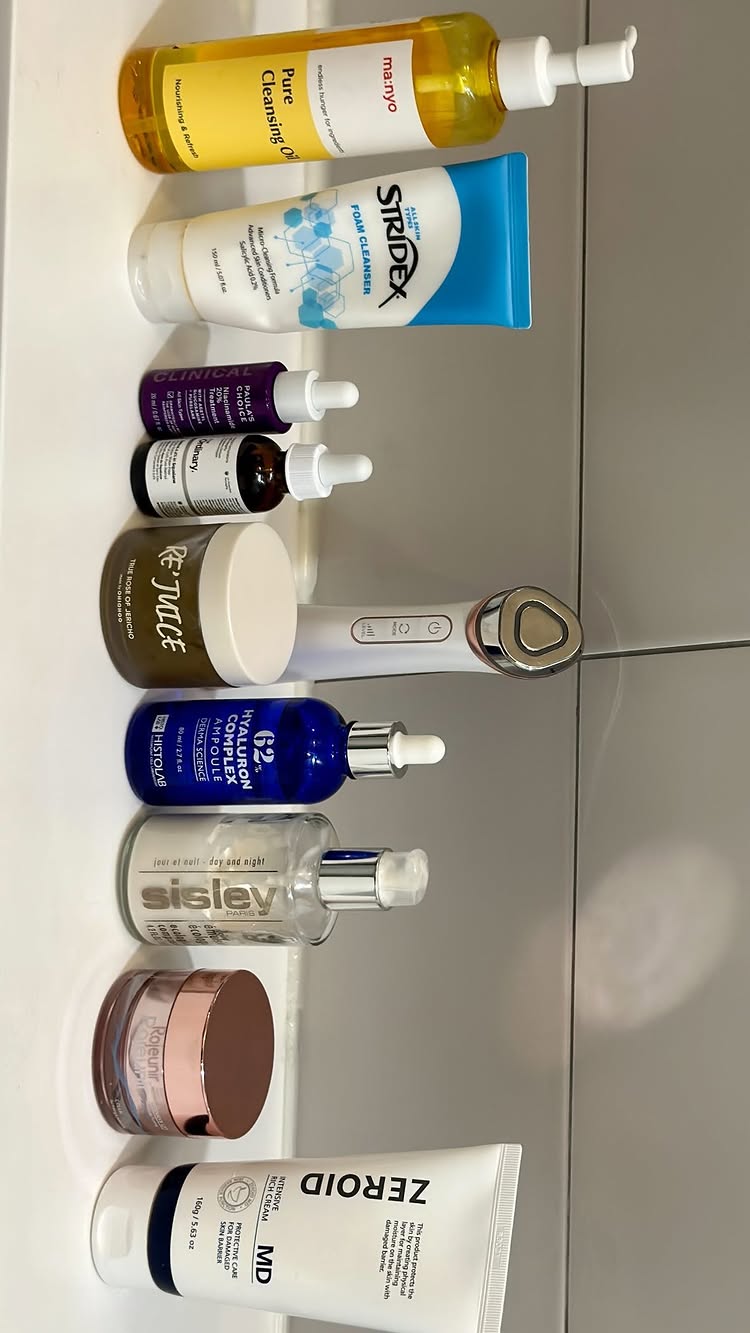
disclaimer: we are not skincare professionals!! this is just what works for my mom & her skin type none of the products are sponsored / gifted me food creator not skincare but hopefully it helps :) 2024 is gonna be my year for self care 💅🏼 List of all the products used 1. Manyo pure cleansing oil 2. Stridex foam cleanser 3. Paula’s choice niacinamide 4. Ordinary Retinol 0.5% Squalane 5. Re’ Juice True Rose of Jericho 6. Centellian 24 Madeca Prime Facial Toning Device 7. Histolab Hyaluron Complex Ampoule 62% 8. Sisley Paris Ecological Compound 9. Rajeunir matrixyl cream 10. Zeroid Intensive Rich Cream #korean #skincare #koreanskincare
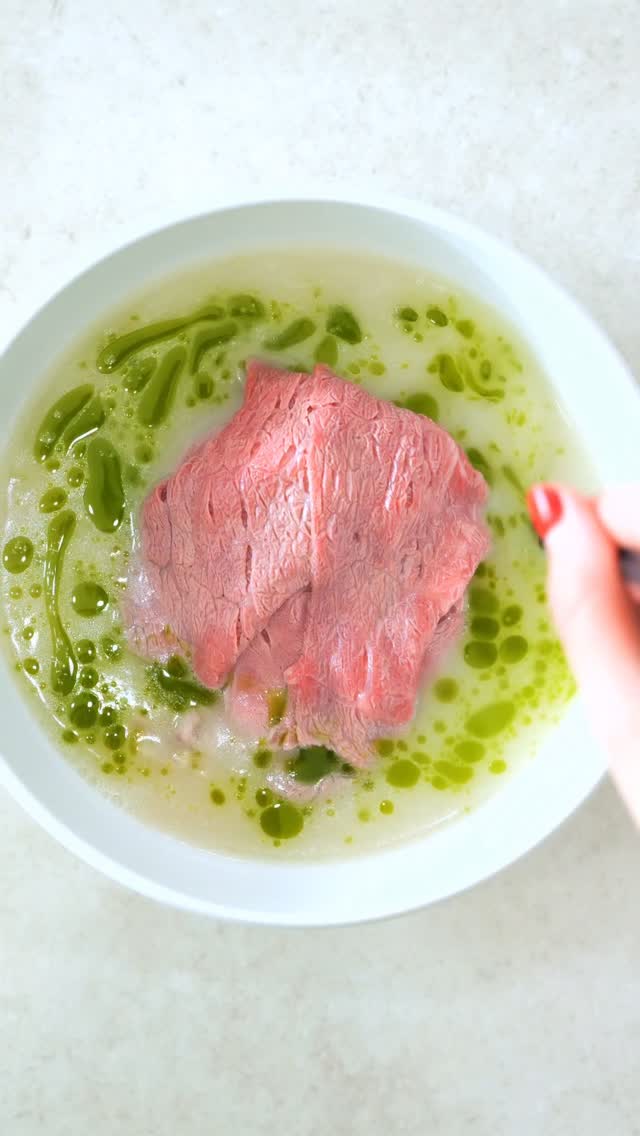
putting my money in b-roth ira 🙂↕️ GREEN GUKBAP RECIPE 2kg beef bones 2kg beef foot or oxtail (extra collagen & nuttier taste) enough water to cover bones Soak bones for at least 1hr - 24hr Pressure cook the bones, discard initial broth, then rinse in cold water. Add the bones to a large pot, cover with water & put parchment paper over and putting on rolling boil medium high. Add more water if necessary. Strain out the broth & you can repeat process up to 3 times. Cool the mixture and skim the fat off when it cools. Green Oil 100g green leek tops finely chopped 100g neutral oil Cook the leek tops in neutral oil to lightly wilt & for aroma. Transfer to blender & blend until smooth. Add the mixture back to the pot to break the emulsification & bring out the color better. Run through cheesecloth & cool oil immediately
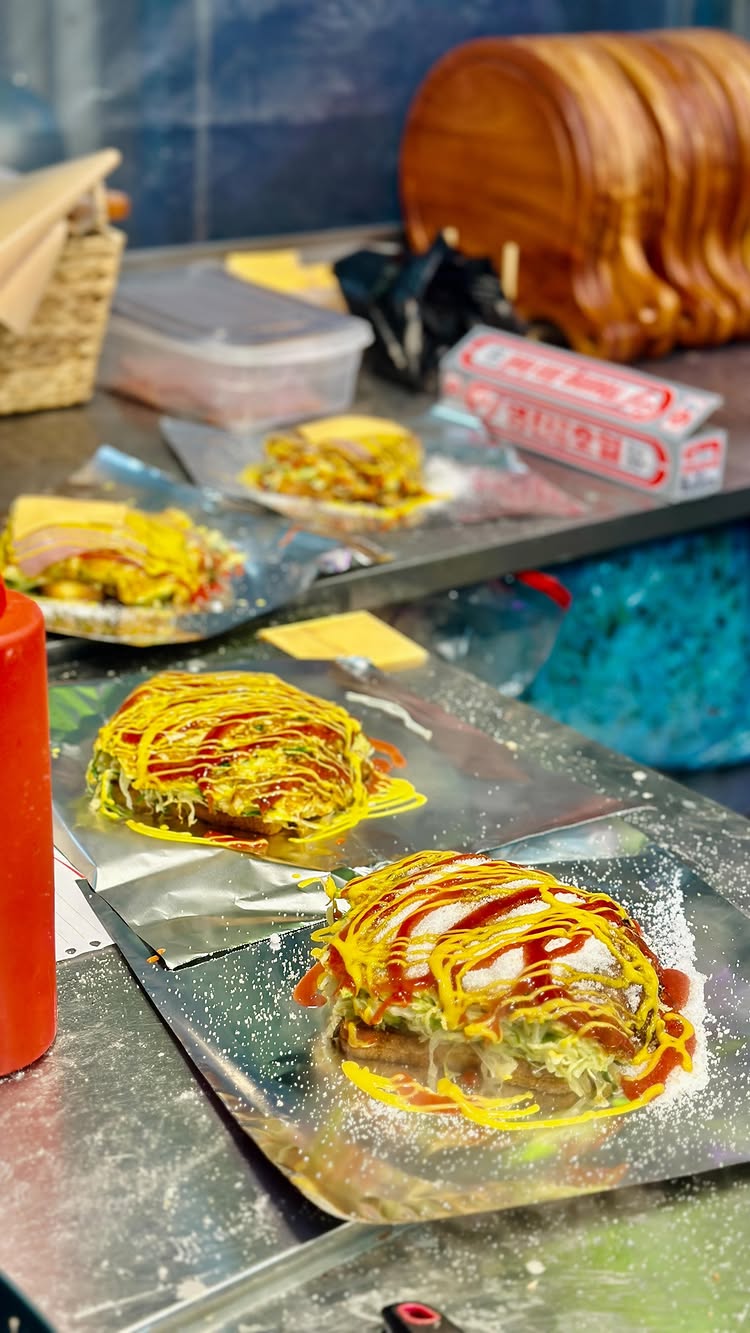
Tina shows how a cheap Korean street food sandwich called Gilgeori toast is made on a sizzling griddle and tastes it on the street.
1.5Mviews
60Klikes
185comments
310shares
6.6Ksaves
1.1Mfollowers
58slong
4.1%liked
hookThe opening frame shows a big wrapped sandwich right in front of the camera while declaring it the best deal for your money.
Friendly face. A young woman smiles at the camera while holding a warm wrapped sandwich in the street.
Night market. Bright storefront signs and street lights create an exciting late night food mood.
Voiceover audio. An energetic voice explains that this Korean street food costs less than two dollars.
Bold text. Text on the screen highlights the cheap price and calls it the best bang for your buck.
Broad appeal. Cheap food and travel taste tests appeal to almost anyone scrolling online.
retainThe video keeps viewers watching by showing the wild cooking process filled with huge mounds of cabbage, margarine, and sugar.
Surprising recipe. The vendor uses a giant block of margarine and heaps on a massive pile of fresh cabbage.
Fast editing. The video has 40 shots in 57.6 seconds, changing every 1.4 seconds to keep high energy.
Clear steps. Viewers see every part of making the toast from buttering the griddle to folding the metal foil.
Visual sizzle. The sound and look of melting butter and frying eggs make the food look delicious.
Honest review. Tina takes big bites and explains how the sweet and salty flavors work together.
rewardViewers learn about a classic Korean street toast while feeling hungry and entertained.
Tempting food. The melted cheese, golden bread, and sauces make the viewer want a warm sandwich.
New knowledge. Viewers learn what Gilgeori toast means and how street vendors prepare it in Seoul.
Travel inspiration. Seeing real street stalls makes people want to visit Korea and eat local street food.
doobydobapkorean street foodgilgeori toastseoul travelstreet food reviewcheap eats seoulkorean sandwichfood reviewviral food videocooking reelstreet food vendorseoul night market
Let me know if you’d like to see a Gilgeori Toast recipe!!! 📍창동 할머니토스트 15 Deongneung-ro 60da-gil, Dobong-gu, Seoul ₩2500 = $1.90 USD #korea #streetfood #koreanstreetfood
What do you want me to bingsu next?!?!?! Corn Bingsu Recipe 🌽🍧 Corn Puree 340g sweet corn (I used canned!) 4 tbsp condensed milk 4 tbsp butter ⅓ cup milk ½ tsp salt Shave the ice, press down in the middle and layer with condensed milk and corn puree, top off with condensed milk, corn puree, frosted flakes, corn, and black pepper! Btw the kitchenaid attachment I used is $75, just search kitchen aid attachment shaved ice on amazon. Super worth it, we used to make watermelon bingsu at mijaseoul with it and was one of our favorite summertime desserts of all times ☀️ #shavedice #빙수 #corn #초당옥수수
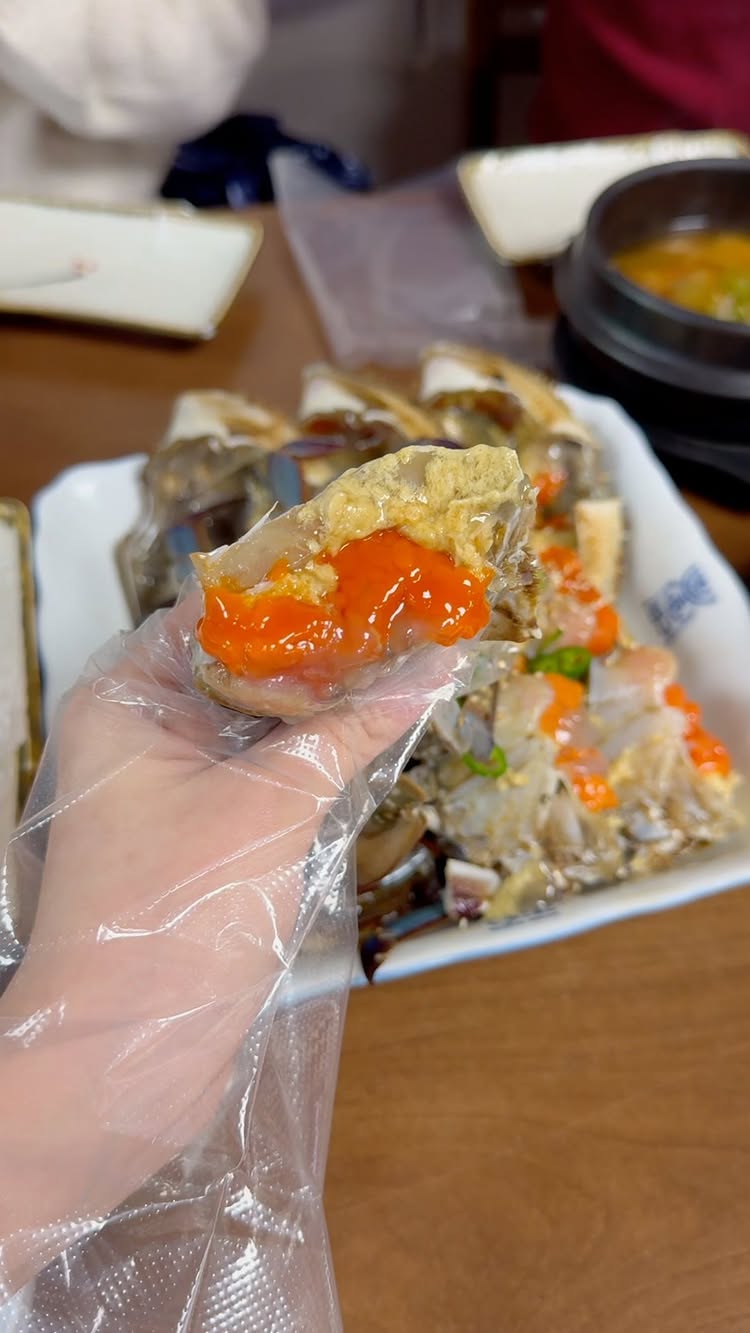
As seen in part of my what i eat in a week living in korea 🇰🇷🇰🇷🇰🇷 available on youtube 📍진미식당 Jinmi Sikdang 186-6 Mapo-daero, Mapo-gu, Seoul Make sure you reserve in advance to avoid the long lines! #간장게장